Thank you for taking the time to visit - I hope my designs provide a little inspiration.
Please pop back soon and if you would like to follow me just click the little blue box below xx

Followers

Follow this blog with bloglovin

Follow on Bloglovin

Saturday 30 August 2014

Hearts and Flowers at Fantasy Stampers

Good morning,

Well, this is my last weekend before I return to school on Monday - where did that six weeks go?!

It's time for our next theme over at my own challenge blog 'FANTASY STAMPERS', so for the next two weeks we would love to see your projects using

'HEARTS AND FLOWERS'.

Here's what I made for my DT inspiration ...


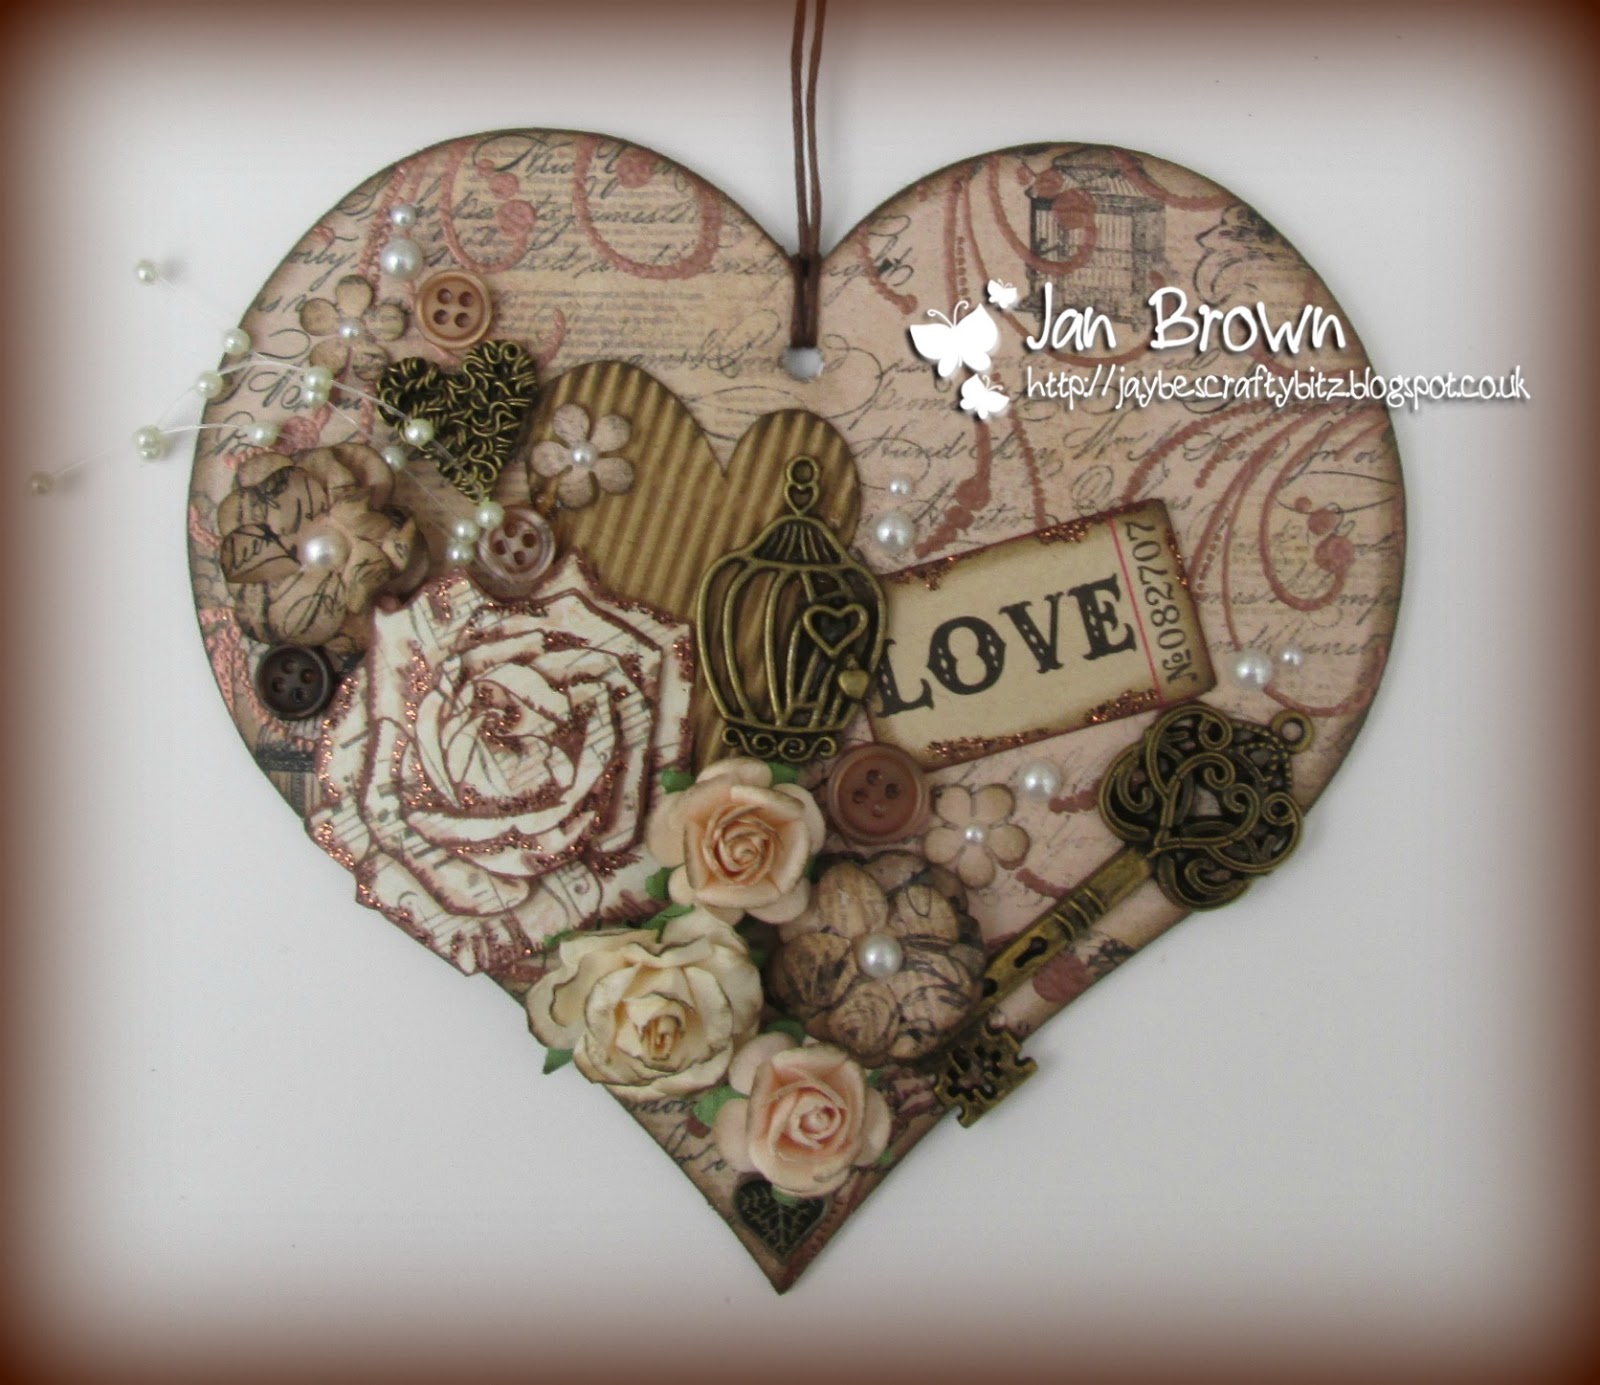
I decided to use one my many chipboard hearts for this one and covered it with a design paper from my stash. I inked the edge with Walnut Stain distress ink then stamped a flourish all the way around the edge using my Versamark inkpad, before embossing with copper detail embossing powder.

I covered the heart with loads of embellishments, including the stamped rose - this has to be one of my favourite flower stamps (it came free with one of my Craft Stamper magazines) and it's also great for layering up. I added a little copper glitter to highlight the shaded areas of the stamp too. Other embellies include some paper roses, a couple of handmade flowers from the leftover backing paper, a corrugated kraft card heart, a metal birdcage, metal heart and gorgeous metal key, a Tim Holtz 'Love' ticket, together with some buttons and a few adhesive pearls.

I hope you can pop over to the challenge blog and check out what my team made and we would love to see you play along too.

Have a great weekend,
Hugz, Jan xx


Tuesday 26 August 2014

Steampunk Tag

Hi there crafty friends and followers,

I'm back today with news of our next challenge over at Cardz 4 Guyz and this week it's my turn to choose the theme. I decided on one of my favourites for male themed cards

'STEAMPUNK'

So, interpret as you wish - there are hundreds of possibilities for this one. Here's what I came up with for my DT inspiration ...


I decided on a tag, rather than a card - gives me a little more freedom. Believe it or not, this started out as a basic white tag! Then I gave it everything I had! 

First I inked the background using three different distress inks - Scattered Straw, Dried Marigold and Fired Brick. Then I added some Walnut Stain around the edges for definition - no project seems complete without some Walnut Stain!

Next I inked up part of one of my stencils with Versamark and positioned it over one side of the tag, before passing it through my Calibur. I added some copper embossing powder to highlight. Then I used my Clarity brick stencil and covered a portion of it with Walnut Stain ink, positioned it on the other side of the tag and passed that through the Calibur again (transferring the ink onto my tag). Finally I put the whole tag through an embossing folder and highlighted the results with a little blue gilding wax.

I stamped out several elements to use on the tag and coloured them with the same ink - those three fellows have been stuck to my noticeboard forever (can't even remember where they came from), but they seemed to fit today. A few stamped cogs, some black ink splats and some brass embellishments to finish off and voila!

I can't wait to see your Steampunk projects - I shall look forward to visiting your blogs this week.

Hugz, Jan xx


Monday 25 August 2014

Something Old/Something New

Good morning,

I hope everyone is enjoying the bank holiday weekend - I have plans for a little retail therapy tomorrow before returning to school next week.

Over at My Besties UK we have a new challenge this morning - as always you can enter an 'Anything Goes' project, but we also have a specific theme if you want to follow that. For the next two weeks Carol chose 
'SOMETHING OLD, 
SOMETHING NEW'

So, your project must use something old (something you have had for a long time) and something new (a recent purchase) and don't forget to tell us what you used. Here goes with my DT inspiration using Sherri's gorgeous little sailor mermaid image 396 ...


I decided to use an old silver starfish charm on my project - I have had a selection of these for ages and always forget about them on my cards. I suppose you could also call my trusty Promarkers 'old' too!

My something new is my lush LOTV paper pad which was purchased at a recent craft show to go with my 'collection' - I nearly have them all now! This one is called 'Beach Bliss' and has a perfect colour palette for my card - I also used some kraft card for layering.

Extra embellishments include a die-cut border - I thought this one could represent the ocean waves! I also used an LOTV stamped sentiment, a couple of hearts, a few adhesive pearls and some pretty frantage powder around the image to accent the bubbles.

I hope you can come and play along with us this time - I shall look forward to seeing your projects.

Hugz, Jan xx


Saturday 16 August 2014

By the Sea at Fantasy Stampers

Good morning everyone,

Well, I'm happy to say that after four weeks I think my back is finally on the mend - I feel much more human again. The trick now is not to do too much at once and set it off again!

Now onto crafty things and it's time for the next challenge over at my own blog 'FANTASY STAMPERS'. For the next two weeks we have a new theme

'BY THE SEA'

Here's what I made for my DT inspiration, which after I made it seems more like 'under the sea' but there you go ...


I knew exactly what I wanted this one to look like. I began with a piece of white Neenah cardstock and stamped out my gorgeous little mermaid image from LOTV in black ink. I then stamped again on a sticky note and cut it out to make a mask to cover up my stamped image.

Then to work with my trusty distress inks - I used a combination of Tumbled Glass, Broken China, Peacock Feathers and Dusty Concord and applied them with a distress ink tool and felt. Once I was happy with the colour distribution I began adding extra detail - a few water splats (it is meant to look like the sea after all), some ink splats using one of my Stampin Up grunge stamps, a few circles using an old lid of something, and some little swirls all the way around the edge using Faded Jeans. Finally a little sprinkling of frantage powder in opposite corners.

Once finished I removed the mask and coloured my little mermaids using my Promarkers and a little added glitter on their wings.

I added a couple of skeleton leaves and some shells to finish off and layered the whole thing on a piece of shiny turquoise cardstock before adding it to my card base.

I hope you will come and play along with us for this one - why not pop over to the blog to see what my team created, there is some fabulous examples.

I am entering this in the challenge over at Creative Inspirations - Under the Sea.

Hugz, Jan xx

Friday 15 August 2014

N for Natural

Good morning,

It's time for our next letter over at the Alphabet Challenge today and Sheena has chosen the new theme for the letter 'N'. For the next two weeks we would love to see your projects using something
'NATURAL'

Here's what I decided on for my DT inspiration ...


I knew straight away that I wanted to use natural colours and I love using kraft card. But the idea of this challenge is to use something on your project that is 'natural' and not 'man-made'. So out came the thinking cap - the obvious choice to me seemed to be wood as that matched the kraft card colour theme. 

So I made a little frame for my stamped image using four wooden cocktail sticks - now weren't they fiddly little buggers to stick together. Hubby to the rescue when he returned from his man shed with some balsa wood glue! I then wrapped each corner with some cotton thread, still not totally trusting the glue.

The background kraft card is run through an embossing folder and inked around the edges for definition. I cut an aperture in the cream cardstock so my rose stamp could peep through. This was one of the freebie stamps that came with my Craft Stamper magazine months ago, but is still a firm favourite and is great for layering up (although not really visible on my photo).

I stamped the sentiment in brown ink and added a piece of hemp cord and a wooden button (coloured with my Tan Promarker to co-ordinate) and a little adhesive pearl in the centre. 

I hope you will come and join us this time - there are lots of other interesting natural things to play with too - feathers, hessian, shells, dried flowers, raffia, wool, leather just to name a few.

Hugz, Jan xx

Tuesday 12 August 2014

Camera/Photo at C4G

Hello again,

I'm back today with news of our next challenge over at Cardz 4 Guyz and this week Janice has chosen the theme of

CAMERA/PHOTO

Now this one challenged me a little and I don't think it's my best work - but here's what I made for my DT inspiration ...


I used a collection of things found in my stash and 'borrowed' a little camera image from the internet (shame!) The wording is stamped with one of the Clarity word chain stamps in Sepia Brown ink.

I am looking forward to seeing your entries this time - I think you can lots better than I did! Lol.
Hugz, Jan xx


Monday 11 August 2014

It's all about the Flowers

Morning everyone,

Well, I definitely think we felt the effects of Hurricaine Bertha last night - had to practically nail everything down outside  it was so windy! I hope everyone is safe out there.

It's time for another challenge over at My Besties UK today and although you can now play along with an 'Anything Goes' theme - we challenged the team to use 'FLOWERS' as an extra element. Well now, that's an easy one - I think I put flowers on nearly everything I make (except for the guys, of course!)

Here's what I made for my DT inspiration using Sherri's gorgeous 'Garden Girl' image 734 ...


I knew straight away which image I wanted to use - I love this one with our little Bestie peeking out through all those beautiful flowers. She is coloured with my Promarkers - the flowers using Cool Aqua and Duck Egg. Think I went a bit mad adding extra die-cut flowers around the edges - but it is the main theme! Extra embellishments include an LOTV stamped sentiment, some pretty lemon polkadot ribbon, a little dragonfly brad and lots of adhesive pearls.

Hope you will come and join us with all your own lovely flowery projects.
Hugz, Jan xx

Tuesday 5 August 2014

A Song Title

Hello crafters,

I'm back today with news of our next challenge over at Cardz 4 Guyz and this week Kim has chosen the theme of

'A SONG TITLE'

Here's what I made for my DT inspiration ...


I chose the song 'Bird on a Wire' and I love the version by the Neville Brothers. 

My card is all done with ink using my inkdusters - first inking through a Clarity brickwork stencil with Antique Linen and Tea Dye (covering the aperture with a die-cut circle first).  Then I covered the outside and worked in the aperture - creating hills with torn paper using Bundled Sage distress ink, a little Tumbled Glass for the sky and some Scattered Straw around the sun.  I drew in my 'wires' using a black micron pen and stamped my little birdie in Gathered Twigs distress ink.

I doodled around the aperture to make it stand out better and added a 'Thank You' sentiment from my Stampin Up 'Sassy Salutations' stamp set.

I hope you will come and join us this week.
Hugz, Jan xx


Saturday 2 August 2014

Buttons and Bows at Fantasy Stampers

Good morning everyone,

I hope you all had a chance to enjoy the glorious sunshine before it turned to showers yesterday.

Now I can't believe another two weeks have passed already, but it's time for our next challenge over at my own challenge blog

FANTASY STAMPERS

For the next two weeks our new theme will be

'BUTTONS & BOWS'

So off to the embellishment box I went and here's what I came up with for my DT inspiration ...


I started by stamping the gorgeous sentiment (by Indigoblu) and embossing it with gold detail powder. Then I ran it through my cutting machine to create a circle to use as a template for my buttons. I added a little red line tape around the edge and secured my chosen buttons to create a kind of 'wreath' effect. This is then mounted on a paper doily which has been inked around the edge for a little definition.  

The background is also stamped with one of the flower stamps from the same set (which actually came free with a recent magazine purchase) using Victorian Velvet distress ink. I also ran it through an embossing folder for extra texture and then inked around the edges with the same ink. I layered it on a piece of sand coloured cardstock to co-ordinate with some of the buttons.

I made a triple bow using some of my favourite organza polkadot ribbon and also added a little pearl bow to finish.  And a few punched butterflies just to finish off.

Why not pop over to the challenge blog and check out some of the fantastic project that my team made.
Hugz, Jan xx